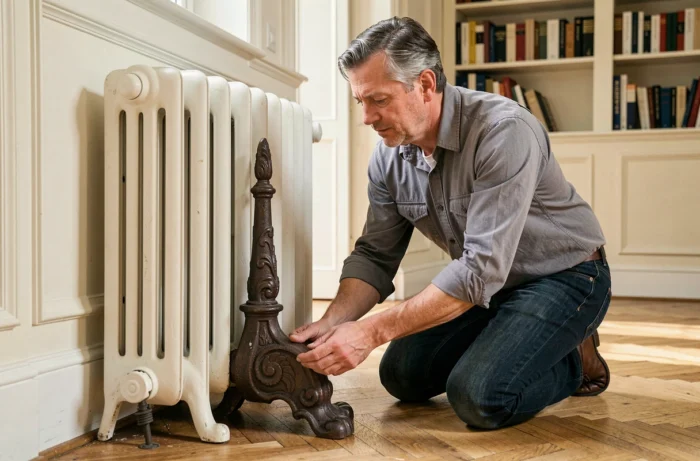
A cast iron radiator often weighs several dozen kilos per element. Installing a cast iron radiator foot without drilling into the wall or floor meets real constraints: a rental property with a no-drilling policy, a heated floor whose screed must not be penetrated, or floating parquet that requires freedom from any obstruction.
The topic goes beyond simple weekend DIY, as the type of flooring and the heating circuit configuration dictate the choice of support.
Heated floor and floating parquet: two cases where drilling is not an option
The most common reason for seeking a no-drill mounting is not aesthetic. It is technical. Drilling into a screed containing a heated floor risks damaging the pipes embedded in the slab. Heating professionals systematically advise against this practice, and some manufacturers prohibit it in their warranty conditions.
Floating parquet presents a different but equally constraining problem. The NF DTU 51.11 (floating engineered wood floors) and NF DTU 51.12 (floating laminate floors), updated in May 2024, remind us that the covering must be able to expand freely under the radiator. Placing a foot directly on a laminate without precautions causes visible lifting over the seasons.
The best practice is to cut the parquet around the feet, leaving a peripheral gap, and then cover the space with rosettes. A cast iron radiator foot placed on the floor without through-fixing meets this constraint, provided that its base is wide enough to distribute the load. You will also find advice on La Petite Maison dans la Prairie detailing models suited to each flooring configuration.
Self-supporting feet for cast iron radiators: selection criteria and compatibility
Not all cast iron radiator feet are created equal. The first selection criterion is not color or price, but the number of columns of the radiator. A foot designed for a two-column model is not suitable for a six-column radiator: the clamping distance differs, and a poor match creates a dangerous imbalance.
What compatibility concretely implies
Specialized manufacturers offer feet suited to major families of cast iron radiators (Idéal Standard, Chappée, etc.). It is essential to measure the thickness of the radiator at the point where the foot will clip or bolt under the columns. A difference of a few millimeters is enough to make the whole assembly unstable.
- Check the number of columns (2, 4, or 6) and the exact model of the radiator before ordering feet
- Measure the depth of the radiator at the fixing point, as dimensions vary even within the same brand
- Prefer feet made of cast iron rather than steel: cast iron absorbs vibrations from the heating circuit better and resists corrosion when in contact with the ground
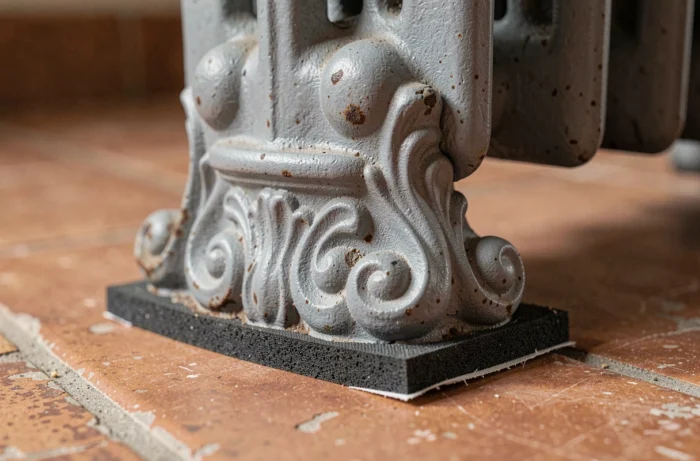
- Ensure that the base of the foot provides a support surface of at least several centimeters in width to distribute the load on a soft floor
A well-sized self-supporting foot can support the weight of the radiator and the water it contains without any wall fixing. The radiator then rests entirely on its feet, eliminating the need for wall brackets and thus dowels.
Installing a cast iron radiator foot without drilling: concrete steps
The installation itself requires method rather than heavy tools. Before any handling, the heating circuit must be drained locally. Close the inlet and return valves of the radiator, then purge the residual water using the bleed key. A cast iron radiator full of water is too heavy to be handled safely.
Preparing the floor and positioning
Place a distribution plate under each foot if the floor is floating parquet or fragile tiles. This plate (metal, thick plywood) distributes the weight over a larger surface and avoids pressure points.
Position the feet at each end of the radiator, never in the center alone. For a long radiator, a third intermediate foot prevents the entire assembly from bending. Align the feet using a level before placing the radiator on top.
Fixing the radiator onto the feet
The radiator is placed on the feet by simple fitting or by tightening with bolts provided in the kit. Tighten progressively and alternately, like for a car wheel, to avoid twisting the foot under the load.
- Fit the radiator onto the first foot, then slide the second foot under the other end
- Check the horizontal alignment with a level placed on top of the radiator
- Tighten the lower fixings without forcing, then check the level again
Once the radiator is stable, reconnect the heating circuit connections. Gradually open the inlet valve, then bleed the trapped air using the bleed key until a continuous flow of water is achieved. Check for leaks at the connections and at the foot of the radiator during the first hours of re-heating.
Long-term stability: what changes compared to a traditional wall fixing
A cast iron radiator on self-supporting feet does not benefit from the load transfer provided by wall brackets. The entire mass rests on the floor. On an old wooden floor, checking the solidity of the joists before installation is a precaution that many neglect.
Field returns vary on stability in case of accidental impact. A radiator fixed to the wall by two brackets tolerates moderate lateral impact. On feet alone, the same impact can shift the entire assembly by a few millimeters, which, if repeated over time, eventually stresses the circuit connections. Some installers add a discreet textile strap between the radiator and the wall (fixed with a high-strength adhesive hook) as an additional safety measure, without drilling.
Adjusting the pressure of the heating circuit and regular bleeding remain the same as in a traditional installation. The foot does not alter the hydraulic functioning of the radiator, only its physical support mode. A visual check of the feet once per heating season is sufficient to detect any loosening or early corrosion from contact with the floor.